
You’ve probably heard our bloggersSEO Support mantra, ‘Annotate, Annotate, ANNOTATE!’ – but do you actually know what we mean? Introducing our first essential tool, Google Analytics.
Google Analytics is the industry standard tool for measuring traffic to your blog, your audience’s behaviour and overall site performance. Along with Search Console, Analytics is one of the tools we frequently use – and we mean FREQUENTLY. Analytics is a simple but in-depth tool for monitoring traffic and understanding how your readers interact with your content – and how they arrive.
Before you can start analysing and interpreting data, you need to connect to your site! Connecting your blog to Google Analytics requires inserting a piece of code onto your site – but don’t worry, it’s super simple and only takes a few minutes. We’ve included installation options for our two most popular blogging platforms, WordPress and Squarespace.
Connecting your Google Analytics account and finding your Tracking Code
1. Your Gmail account
If you don’t already have a Gmail account set up, you can easily create one for free here. Gmail is a free online mail service, that is integral for a number of tools bloggersSEO recommends – such as Google Analytics, Search Console, and YouTube. Alternatively, you can log in here.
2. Opening Google Analytics
Head to analytics.google.com – if you’re not already logged in to your Gmail, you can do this in the top right-hand corner.
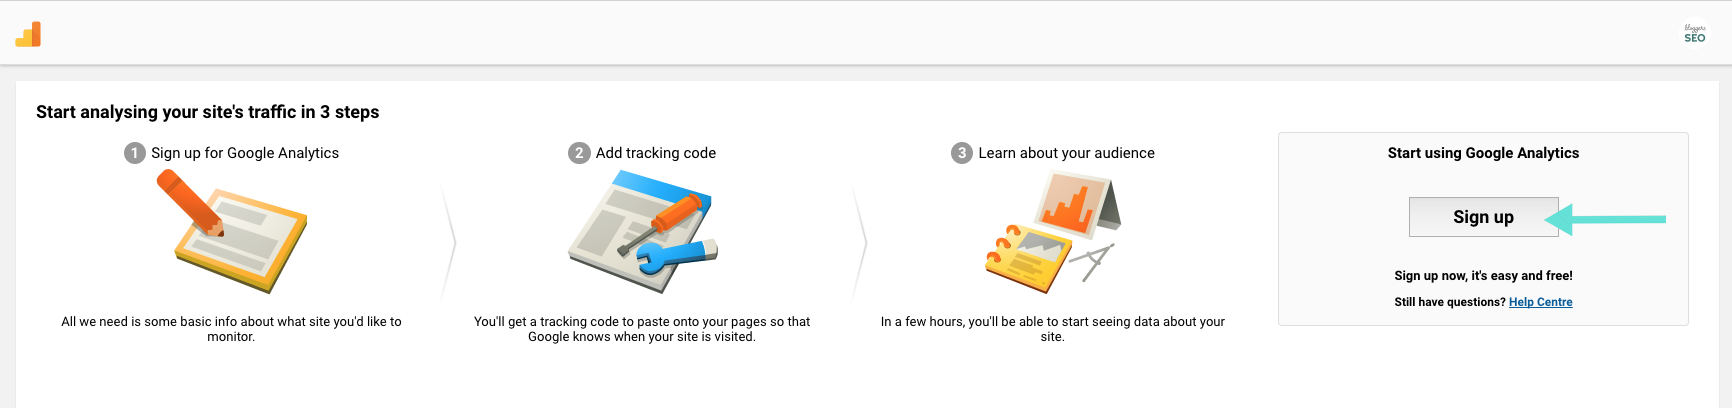
You’ll be prompted with the Google Analytics sign up page – click the ‘Sign Up’ button on the far right.
3. Connecting your website
You’re able to run a number of sites through one Google analytics site. For each site you want data on, you’ll need to create a separate ‘account’ – these aren’t separate Gmails, just ‘installs’ within your Gmail account.
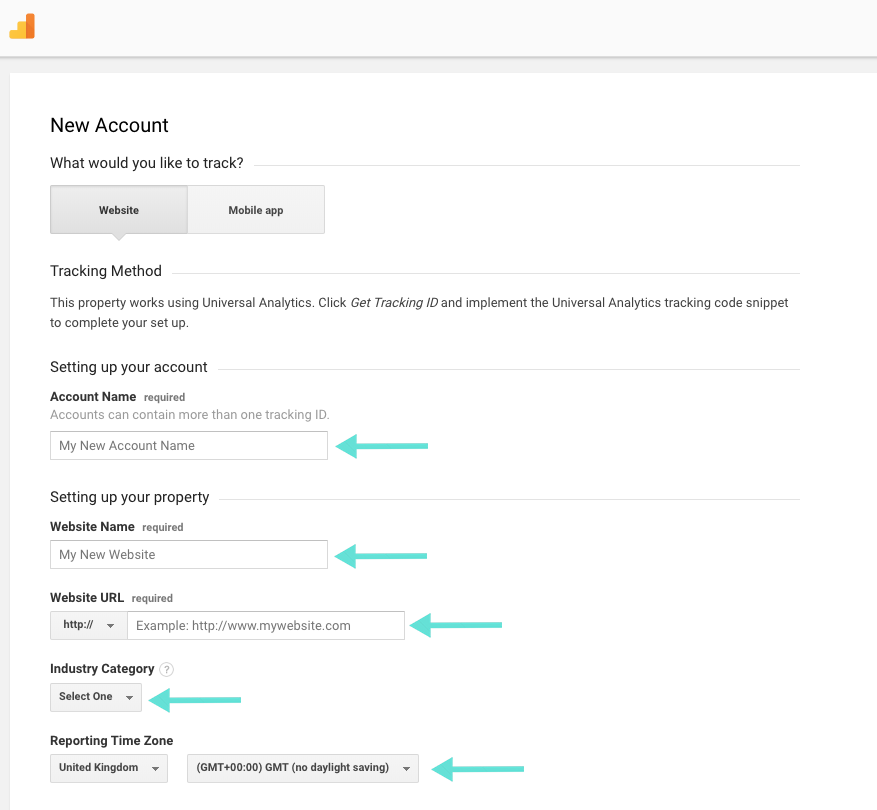
- Name your account something easy to remember, such as your brand or site name.
- Enter the name of your site (such as bloggersSEO)
- Enter your URL – remember to select whether your site is HTTP or HTTPS, and use the main version of your site – www. Or non-www.
- Select your industry, or something close to. There’s also an ‘other’ category available.
- Select your Reporting Time Zone – select YOUR timezone
- In the next section, consider which data sharing settings are right for you. bloggersSEO leaves all options selected, but unchecking any boxes won’t greatly hinder your Analytics experience.
- Click ‘Get Tracking ID’
4. Terms of Service
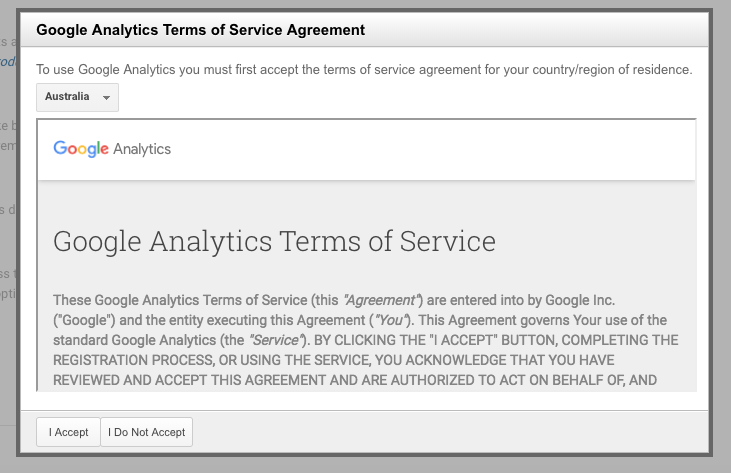
When connecting a new site Google will prompt you to read and accept their Terms of Service – this is entirely up to you, but you will not be able to proceed without selecting ‘I Accept’
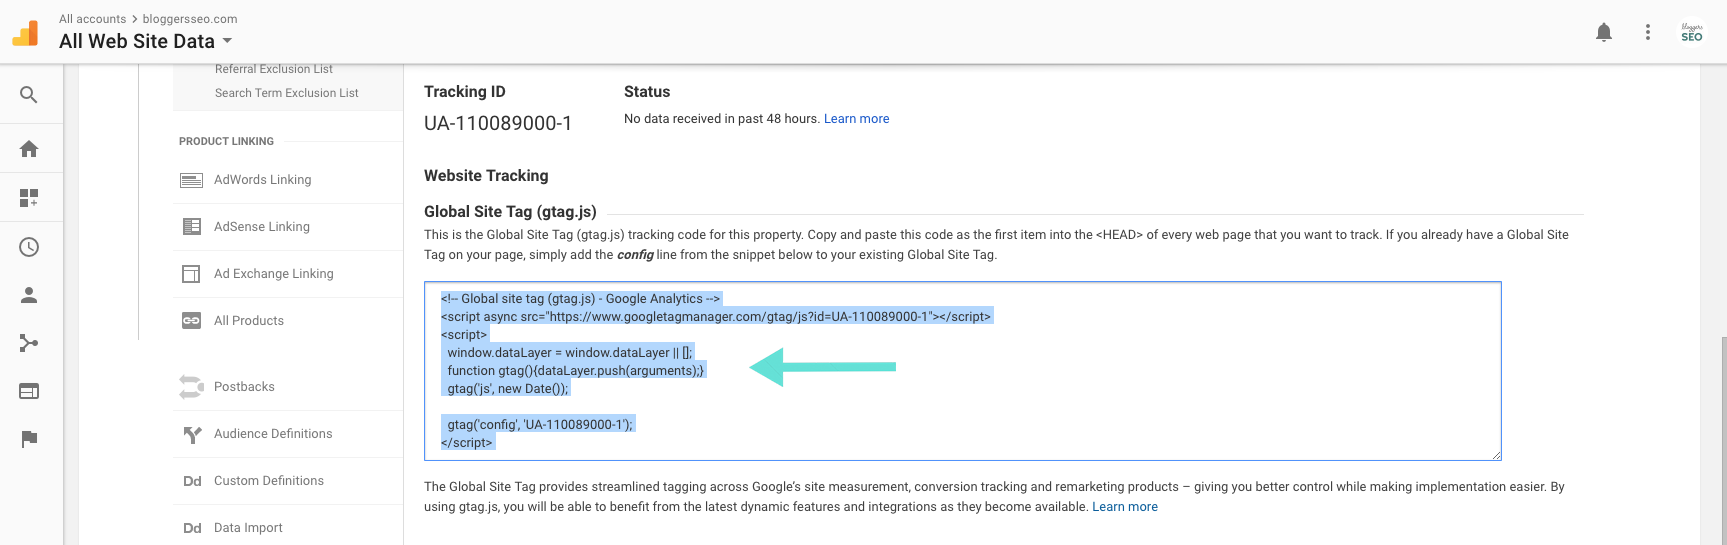
5. Get your tracking code!
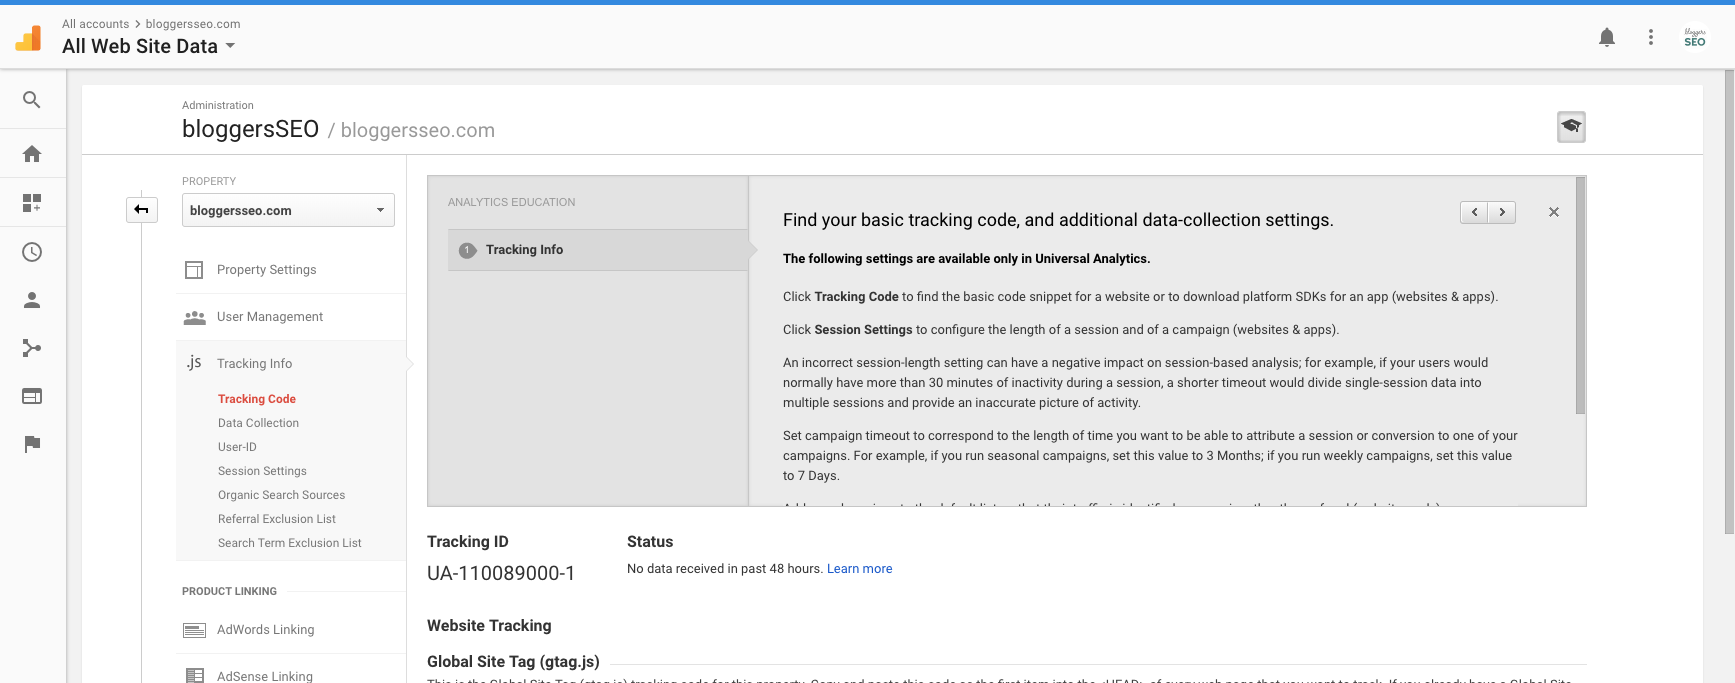
You may get a grey ‘Analytics education’ box at the top of your screen – scroll past this to the ‘Website Tracking’ section. Depending on what CMS you use, you’ll need either the Tracking ID or the Tracking Code in the ‘Global Site Tag’ section – keep scrolling to see which option is right for you.
Installing your Tracking Code on WordPress
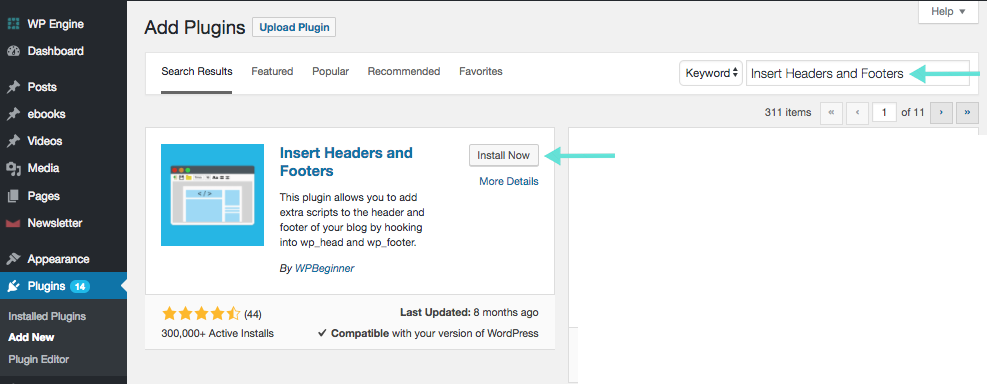
1. Install ‘Insert Headers & Footers’ plugin
This plugin allows you to inject ‘invisible’ code into pages on your website. Google Analytics and other programs use these pieces of code to communicate and gather data without affecting the user’s experience. There is a wide range of uses for inserting header and footer code.
In a new browser tab, log into your WordPress backend, and go to the Plugins tab, and select ‘Add New’ from the drop-down. Search for ‘Insert Headers and Footers’. Find the version created by WPBeginner (usually the first option), and click ‘Install Now’.
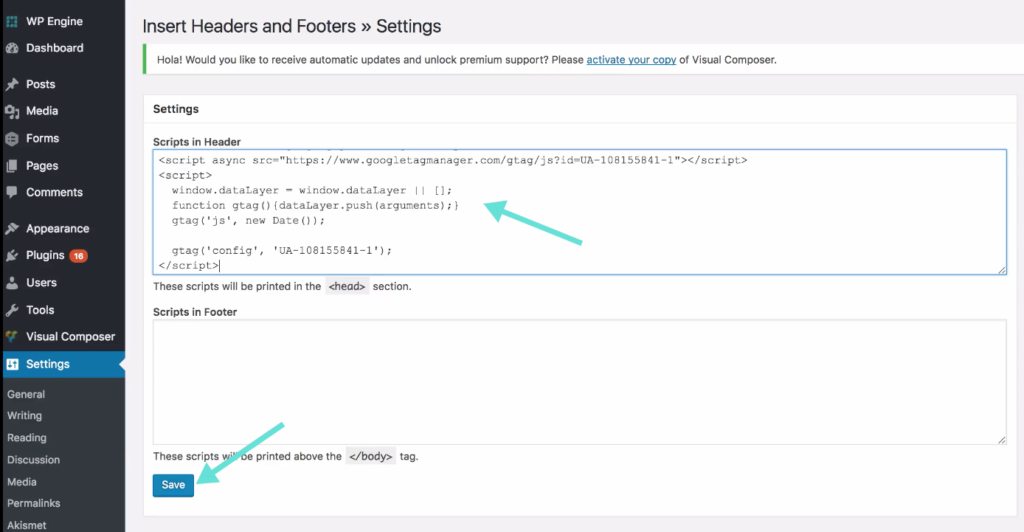
2. Inserting code onto your site
Open your ‘Insert Headers & Footers’ plugin. You’ll see two empty boxes, labelled ‘Scripts in Header’ and ‘Scripts in Footer’ – this means whether the code will be read at the start or the end of your web pages. Different pieces of code require different placement, but today we’ll be pasting the entire piece of tracking code from Google Analytics into the ‘Scripts in Header’ box, and hit ‘Save’. You’re done!
Installing your Tracking ID on Squarespace
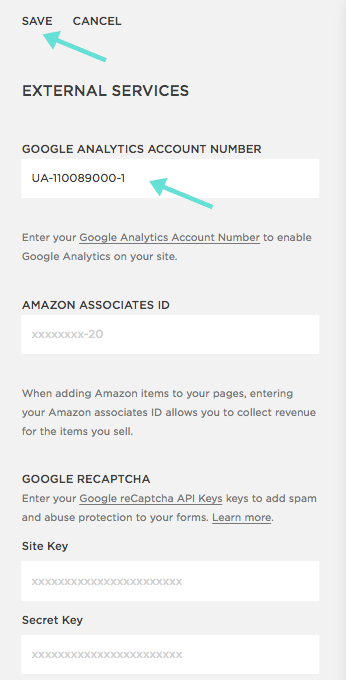
1. Adding External Services
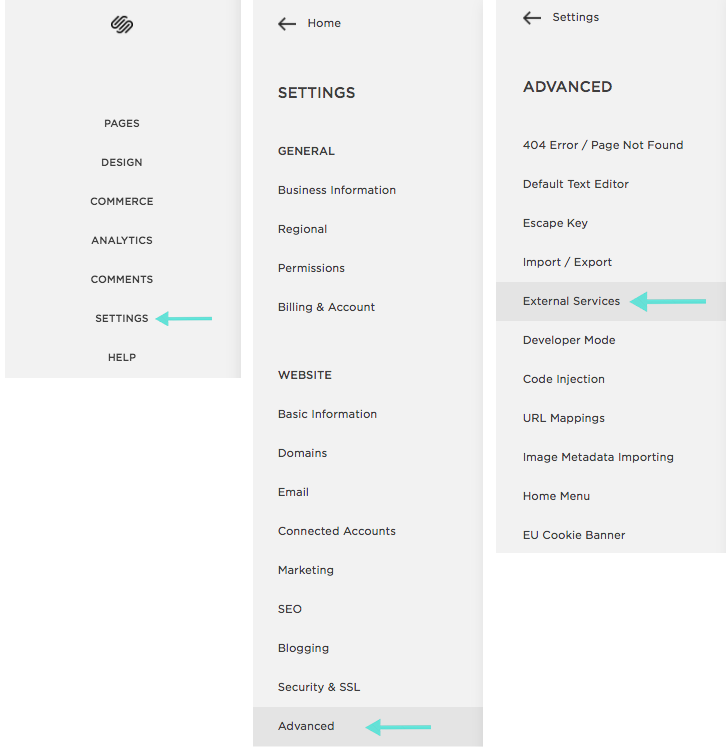
Log into your Squarespace account, and select ‘Settings’ from the home menu.
In the following windows, select ‘Advanced’, then ‘External Settings’. You’ll need the first box available, ‘Google Analytics Account Number’.
2. Find your Tracking ID
To connect Google Analytics to Squarespace, you’ll need to use your Tracking ID instead of your Tracking Code. Both options are available on a single page – if you’ve closed your Google Analytics window, follow the steps in the ‘Find your Tracking Code’ section below.

Copy your Tracking ID, and paste it into the ‘Google Analytics Account Number’ box in Squarespace and hit ‘Save’ – you’re done!
However you connect your site to Google Analytics, you’ll need to wait a few days for data to populate, so be patient and check back in a few days.
If you’d like more information on navigating your Google Analytics account, making sense of data and customising reports, head over to SEO Superheroes – we’ll show you everything you need to know to effectively use Google Analytics.
HOW TO FIND YOUR TRACKING CODE
Sometimes you might need to get back to your tracking code or tracking ID – follow these steps to easily find them.
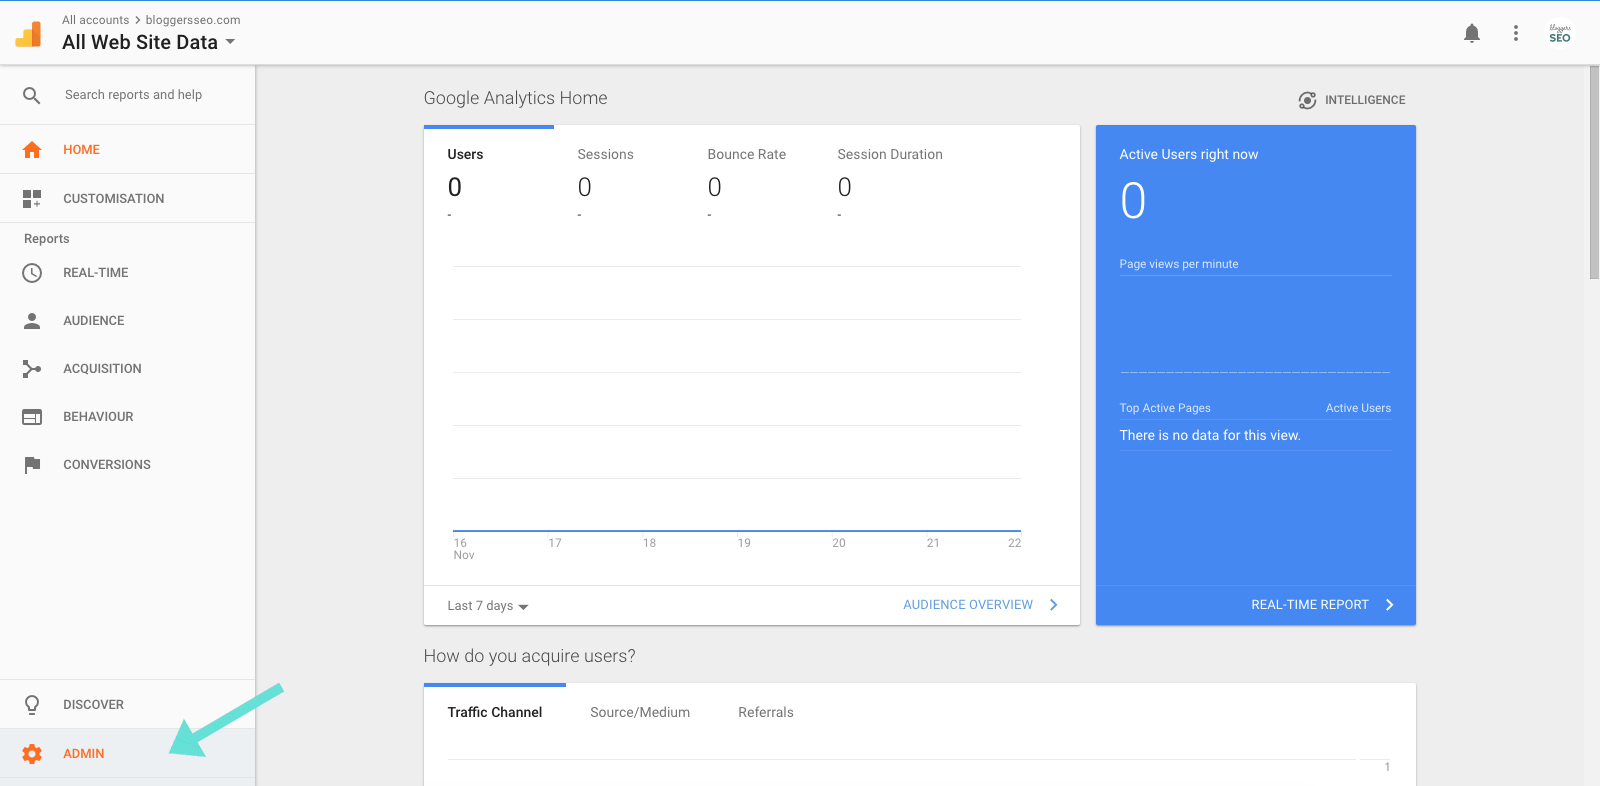
1. In your Analytics account, select the ‘Admin’ cog in the bottom right-hand corner. This will open up a table where you can select a variety of options for any sites currently connected.
2. In the account column, select the site you need – do the same for the ‘property’ column. In the drop-down below, select ‘Tracking Info’ > ‘Tracking Code’ – this will open up the same window as step 5. From here, you can follow the WordPress or SquareSpace steps as necessary.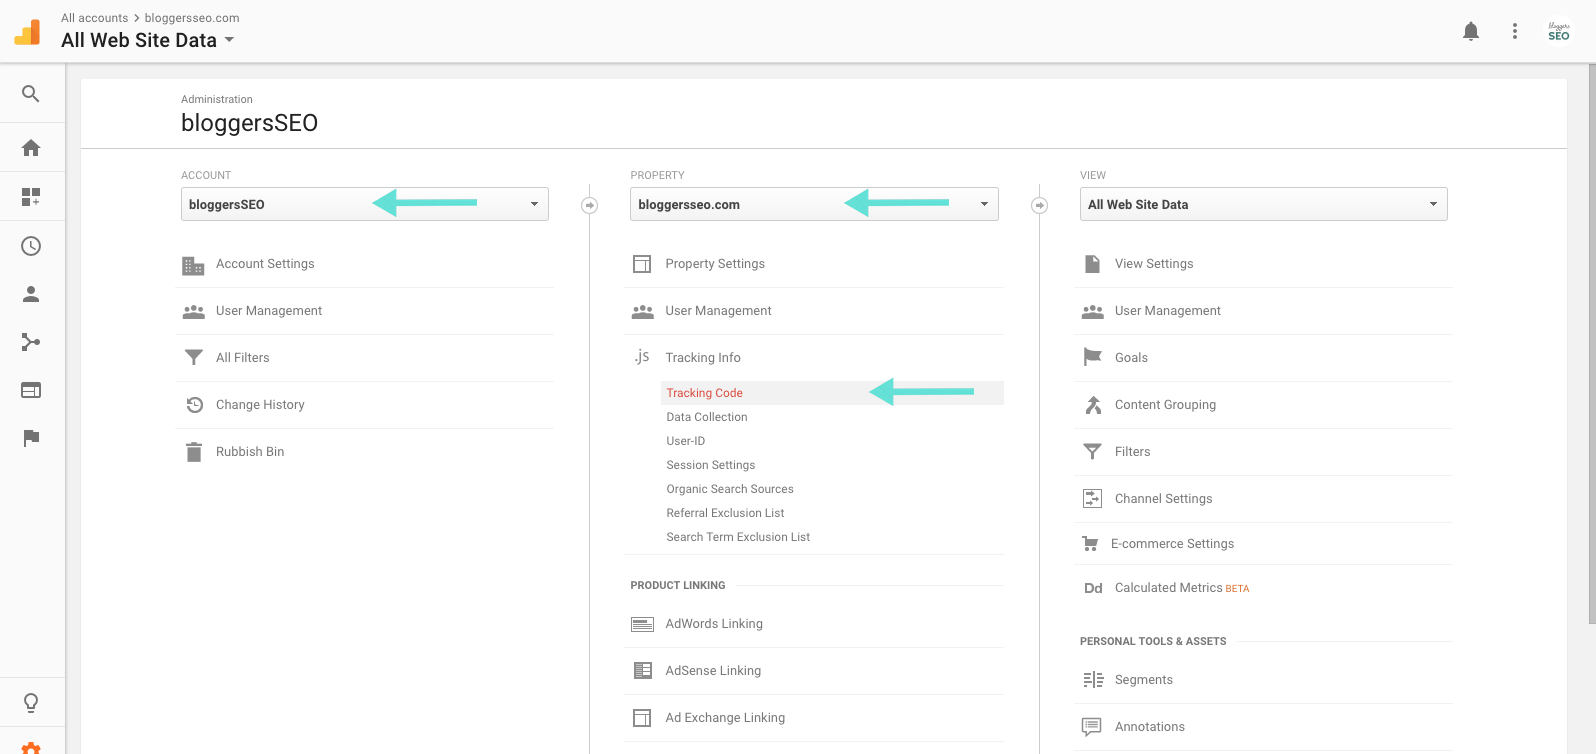
How does it feel? You’ve got one of the most effective and in-depth analysis tools connected to your site, that will allow you to gain a greater understanding of your audience, their behaviour, and how you can improve their experience on your site.
What results did you find? Where you nicely surprised by the data, or does it encourage you to keep working? Let us know in bloggersSEO Support – we’ll help you make the changes you need!
If you’d like to learn more about Google Analytics and how to use to effectively for your blog, why not join our SEO Super Squad?