
Search Console (previously known as Webmaster Tools) allows you to understand the relationship between your content and your audience’s search behaviour. Inside you’ll find refined data showing you exactly how organic search visitors are reaching your content, and new ways to improve their experience, AND your rankings. Search Console reveals what keywords and phrases your readers are REALLY searching for, where you rank for keywords you’re monitoring (and those you aren’t), opportunities to significantly improve your rankings, and if you’ve scored any Rich Snippets.
You’ll need to complete this process for ALL versions of your site – HTTP and HTTPS, www. and non-www. Repeat this process four times for each of your URLs (see below). When completed, you’ll be able to see four properties in your Search Console dashboard. While only one of these sites is ‘live’ and all other versions redirect automatically, it’s important that Google can see the relationship between these sites, and allows you to easily detect and remove any errors. If you currently don’t have HTTPS (SLL certificate) enabled on your site, visit our HTTPS Migration class.
URL versions to configure:
http://yourdomain.com | http://www.yourdomain.com | https://yourdomain.com | https://www.yourdomain.com
1. Log Into Search Console
You can use your Gmail account we set up yesterday for Google Analytics, or follow Google’s setup instructions here. Then, open Search Console, where you’ll be prompted to log in. If you’re already logged in through another Google product such as Gmail or Drive, you’ll be taken straight to the Search Console homepage.
 In the top right-hand corner, you’ll see the ‘Add A Property’ button – click this, and enter your website into the box provided, and hit ‘ADD’. Remember: complete the entire process for all versions of your site.
 Next, you’ll need to verify you’re the owner or manager of the site. This only requires access to your site’s back end, and ensures others cannot repeat the same process without your permission!
VERIFYING YOUR WORDPRESS SITE
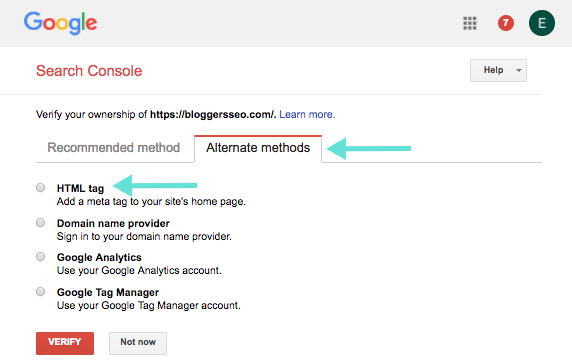
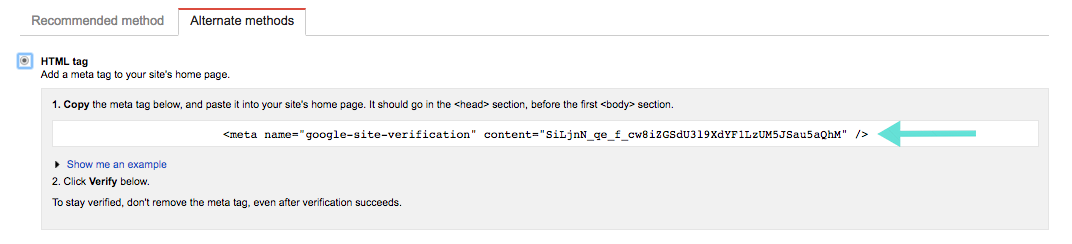
For a WordPress blog, you’ll need to place a new piece of code on your site. In the Verify Ownership screen, select the second tab ‘Alternate Methods’, then the ‘HTML tag’ option. This will generate a single piece of code – copy the whole piece.
Next, open your WordPress backend and open Yoast. If you currently don’t have Yoast installed on your site, you can follow our super short guide here. In Yoast, go to the ‘Webmaster Tools’ tab and find the ‘Google Search Console’ box – paste your code in here, and click ‘Save Changes’.
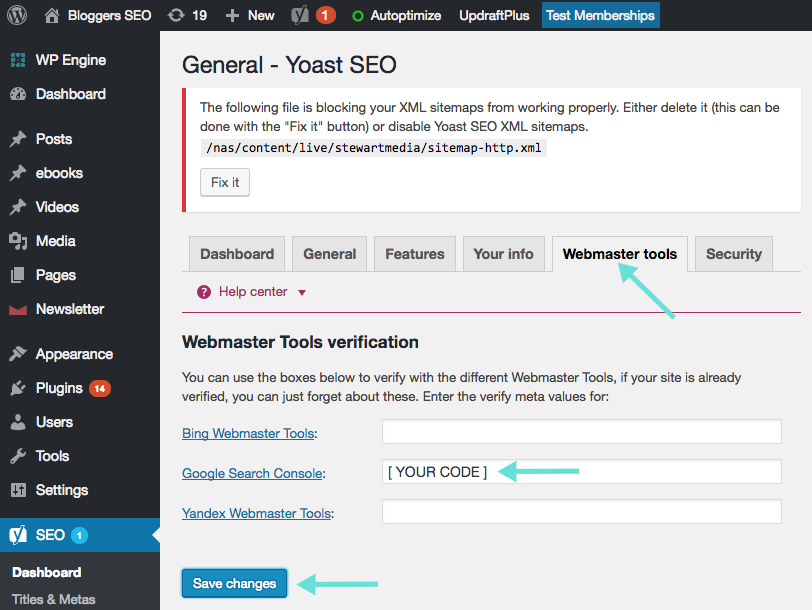 Then head back to your Search Console tab and click ‘VERIFY’ – and you’re done!
VERIFYING YOUR SQUARESPACE SITE
If you’ve already set up Google Analytics, connecting your Squarespace site to Search Console is SUPER easy!
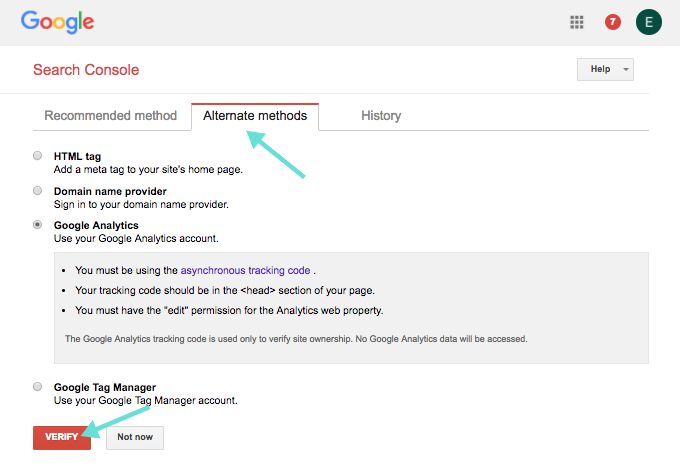
In the ‘Verify Ownership’ page, select the ‘Alternate Methods’ tab, and the ‘Google Analytics’ option, then ‘VERIFY’ – and THAT’S it!
Now you’ve got Search Console connected, you might be wondering what all that data really means, and how you can use it to better serve your blog. Join our Super Squad and we’ll show you exactly how to get the MOST out of Search Console – what all those options really mean, how to find the data you actually need and translating those numbers into a real traffic boost.