We all know that dread that fills us the second someone brings out a home video – the “oh NO, I don’t want to hear my own voice” chimes from within, and you do everything you can to laugh it off… but that pang that comes with watching yourself on video still remains. You might already be thinking “videos just not for me, okay?” and edging towards that ‘close window’ button. Stick around for just a little longer.
Video doesn’t have to be scary – you can do as many takes as you want, and have the final say on what goes out into the world. It’s a great way to express yourself, and throw your personality into your content. Video isn’t the be-all and end-all of blogging – but why not at least give it a shot? We’re giving you some quick tips to keep in mind the next time you step in front of the camera.
The MOST important part of creating video for your blog isn’t confidence – it’s authenticity. Video allows you to communicate your message a little differently to a blog post, conveying your style, passion and knowledge TENFOLD. Your audience wants to connect with the person behind the words, so make sure that’s who you deliver – not who you think you should be.
We’re not saying go and create an amazing YouTube video RIGHT NOW and go viral in seconds – we’re just giving you some tips to keep in mind, and so you can start practising! Even if you’re not ready to share a video with your audience for months, why not start practising now? You’ll be leaps and bounds ahead of where you started, and know that the first video you share with your audience actually isn’t your first, but is instead the first video that perfectly shares your message with them.
Let There Be Light!
The first thing your audience wants to do is SEE you! If you’re hiding in the shadows, your viewers will feel less of a connection with you, and it will take longer for them to fully engage with your content. Record your videos in well-lit places, and avoid harsh shadows or partial darkness – otherwise, you could end up looking like a movie villain! The easiest thing to do is park yourself in front of a window – check out our guide to photography for more simple lighting tips.
Tip: if you’re using a tripod, make sure it’s not directly between you and your light source, blocking light and creating shadows!
Turn Up The Noise
Second, make sure your audience can hear you! Otherwise, you may as well be writing a blog post. Test your phone or camera microphone quality, and playback volume. Experiment with how loudly you need to speak, and the distance between you and the mic. Try to cut background noise to a minimal, closing windows and turning off radios – your audience wants to focus on your message so don’t distract them with constant, unrelated sound.
Note: Smartphones have advanced by leaps and bounds, and their cameras will serve you in almost any situation – however, their microphones are not always so reliable. Avoid windy situations and high background noise areas when using the inbuilt mic.
Tip: before you record your entire video, TEST! Do a short ‘1,2,3 testing’ video and run through a snippet of your content – can you be heard? Can you be seen? Do you need to adjust the frame?
Show Yourself!
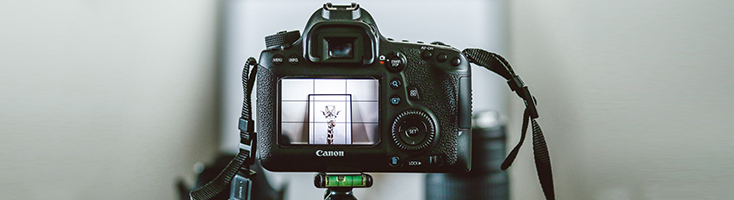
Photographers can spend days framing a shot, but you only need to spend a few minutes. When setting your camera up, avoid a SUPER close up – take a step back, and go for a relaxed mid-shot instead. Most bloggers and YouTubers record themselves from the chest/waist up, with a small piece of space between the top of their head and the edge of the video frame. This allows you room to move, get your hands in the frame, and a little room to crop later!
Think of how your content will be displayed – is it best to film your video horizontally, or vertically? Both of these can easily be cropped to square formats (like for Instagram), just make sure you give yourself enough room in the frame. Horizontal videos can be rotated to fill a screen on mobile devices, while a vertical video won’t look too flash on YouTube. Consider the end product and desired results before hitting record.
Steady Yourself
You don’t always have to buy a $700 tripod to shoot good footage – a pile of boxes and a bit of blue-tack can still do a great job, and creates a stable recording rather than one suffering from ‘shaky arm’. However, you prop up your camera, make sure it’s stable, and not going to slip or fall over! If you’re going to be moving around, consider whether or not vibrations through the floor will affect your camera – don’t forget about how you’ll be positioned in the frame too!
Adding Bonus Content
Video doesn’t have to be all about your face. You might’ve participated in a few webinars in your travels, and noticed that your teachers aren’t on screen all the time. You can switch up your viewers’ screen with slides, infographics, and even screen recordings – try products like ScreenFlow that record your desktop and microphones, AND allow you to edit recorded OR imported footage, sounds, images… the list is endless!
Get Editing
Tip number one – BACK UP! As you develop your own editing workflow, you’ll be able to easily rearrange and delete without worrying – for now, keep a copy of the original files, and edit a duplicate. Whether it’s on your device or a hard drive, having the original will save you rerecording if you permanently delete a section!
There is a range of video editing tools available, and the simplest are great for beginners. iMovie comes free with all Apple computers, and Windows Movie Maker is a great PC equivalent. Once you’re familiar with the way editing programs work and decide video is a great format for your blog, you may want to step up to a program like ScreenFlow that allows for finer tuning and more advanced controls.
Most importantly? HAVE FUN! Enjoy the ride of creating your own videos, and accept we’re all human – sometimes a little more than others, and laughing at yourself will make it all the more enjoyable. When you’re ready to share your very first video, we’d love to see it!