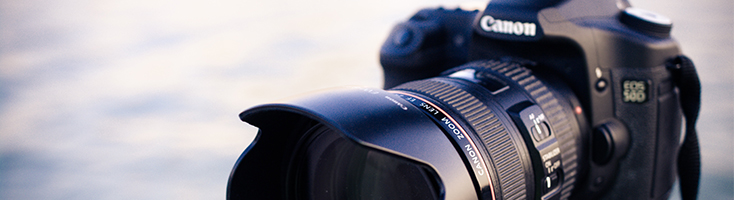
While there is an abundance of free stock photo galleries available at your fingertips, sometimes you just need to create an image yourself – I’m looking at YOU, recipe bloggers, fashionistas and design queens! As bloggersSEO’s resident photographer (go on, stalk me – let’s see what you can find!) I know the benefits of carrying around a huge hunk of metal, but I ALSO love the convenience of using a phone or smaller camera, and the impressive shots non-pro gear can get!
This post is based off using your mobile phone (Apple or Android, no political stance over here), but can easily be applied to point-and-shoot cameras or DSLRs – we’ll be covering some photography basics first to help you understand what goes into making the perfect image.
We’re only just getting you started on your photography journey so we won’t crack out the big guns yet – your head is probably full of ‘Top Photography Tips for Bloggers’ listicles already, and we don’t want to be the 100th person to tell you to buy a tripod (via an affiliate link, nonetheless). Instead of following the crowd, we’re sharing the knowledge behind taking a photograph so you can tackle all those listicles in minutes.
The Fundamentals of Lighting
Without getting controversial, I’d say the most important part of taking a photo is LIGHTING. Why? Because cameras NEED light to function! Without it, they’re unable to ‘see’ – just like your own eyes. Cameras actually bear a range of amazing similarities to our human eyes in respects to the way they process the amount of light and the colour of the light. Chuck me an email if you want to hear me be amazed by this for hours.
It’s gonna get a little technical for a minute, but stay with me! Knowing how your camera works (regardless of what you’re using) means you can manipulate it to your advantage and use features you never even knew existed. PLUS, smartphone cameras are built on the technology of old, and many newer models are embracing their heritage and giving back full control.
In a dark room, our pupils expand to let in more light or contract to allow less – think of when you walk out of a movie into bright daylight. Your eyes adjust in a matter of seconds, and suddenly you’re seeing everything at the same ‘brightness’ without doing anything at all. Cameras have the two ways of recreating this function, ISO (International Standards Organisation, but no one ever bothers with that) and ‘F-Stop’. Both of these functions happen automatically in a smartphone camera, but it is important to your overall image to understand and keep in mind when composing a shot – AND if you want to take advantage of those manual controls!
Controlling Your ISO
You might remember ISO from back in the film & analogue camera days as that little number on the cardboard box that indicates the ‘speed’ of the film. That number indicates how sensitive a roll of film is to light – ISO100 is quite a slow speed and does well in bright, outdoor situations. Up the other end, ISO 1200 is a faster film that does well in low light – like indoor concerts. Digital cameras can go to crazy high speeds like 25,6000 that allow you to capture images in near darkness.
Why do we care about ISO? GRAIN! That horrible blurry, dirty look you get when you take an image in not so perfect lighting. If you take a portrait in clear sunlight (low ISO!) your image will be free from grain – if you take a photo at a dark concert with high ISO to compensate for the lack of lighting, you’ll end up with a fine layer of static across your image. Sometimes grain can’t be helped, but it’s certainly easier to avoid in the first place than fix in photoshop. It’s important to consider the effect low lighting has on your final image, to avoid capturing a perfect composition that looks a little drab. Bright lighting = beautiful, crisp images every time!
Understanding F-Stops
ISO works hand in hand with our next feature – if you’re lucky enough to get your hands on a DSLR camera, you’ll also have an F-Stop function on your lens that gives you a range of numbers to choose from (like f1.8-f22). This allows you to physically alter the hole through which light can enter – just like when your pupil adjusts. There is a group of ‘petals’ (interlocking pieces of plastic/metal) that rotate inside the lens to adjust the size of this hole.
An F-Stop smaller number indicates a bigger hole (why!?) which means more light coming in through the lens and hitting the camera’s sensor, where your ISO comes into play. Combine a low ISO with a small F-Stop (low sensitivity, lots of light), and you’ll have a beautiful image – but a low ISO with a big F-Stop (low sensitivity, low light) and you’ll end up struggling to distinguish details in a dark image.
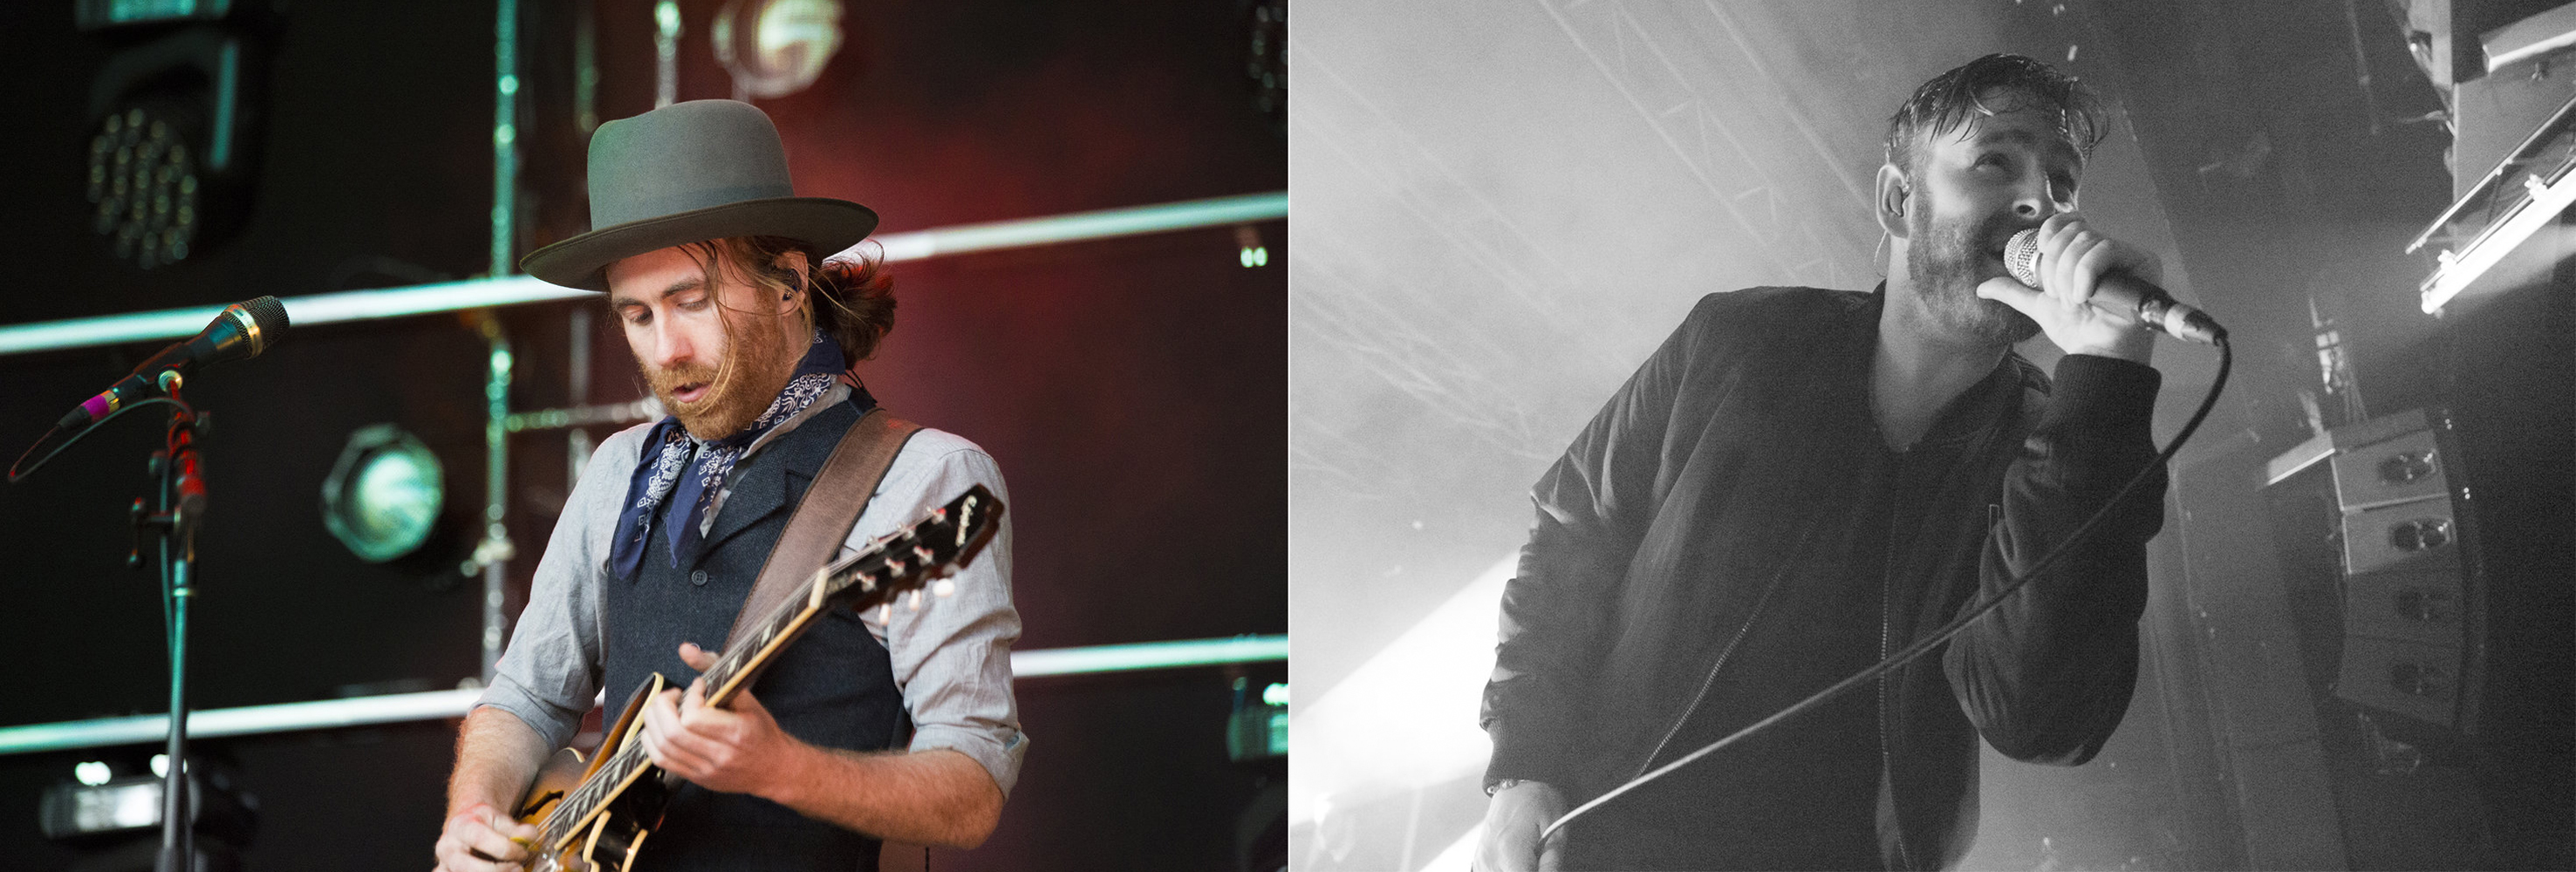
Using F-Stop to control the amount of light coming into your camera has one major downside – blur! A small F-Stop (remember, bigger hole) means that LESS of your image is in focus, creating a softened background – think of an image of a single flower. A bigger F-Stop (smaller hole) allows more and more of the image to be in focus – highly useful in landscape photography. This is called ‘Depth of Field’ – think of Depth of Field like short-sightedness VS 20-20 vision – it’s THAT simple!
This is where we use ISO to bridge the gap between the amount of light we need VS the amount of the image we need in focus. See if you can spot the low depth of field in the coloured image above – see how the background and lighting rig is out of focus?
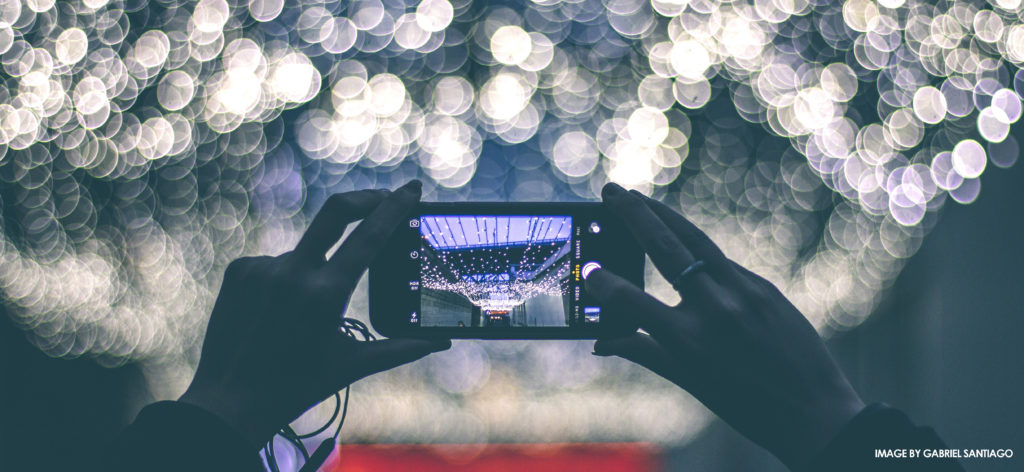
Showstopping Bokeh
Tech aside, there’s one thing the blogging world loves – BOKEH! I’m sure you’ve stumbled across a ‘DIY Bokeh Tutorial’ before, and I hope you’ll take full advantage of once you’ve got the basics down. Bokeh is essentially a naturally occurring camera effect that comes from a low depth of field combined with lights outside of the focused area.
You might have seen Bokeh and Depth of Field in action in Apple’s new ‘Portrait’ camera mode – that beautifully focused face, with a softened background? How about in Instagram or Snapchat filters? It’s nothing new, in fact, it’s an OLD photography technique – although we’re LOVING the convenience.
Using Natural Lighting
Now you know why good lighting is so important, you’re probably sweating at the thought of forking out for a full set up – but you don’t have to! Whether you’re taking a portrait for your About Me section or a delicious meal for your newest post, you can save hundreds simply by parking yourself near a window.
Shooting Outdoors
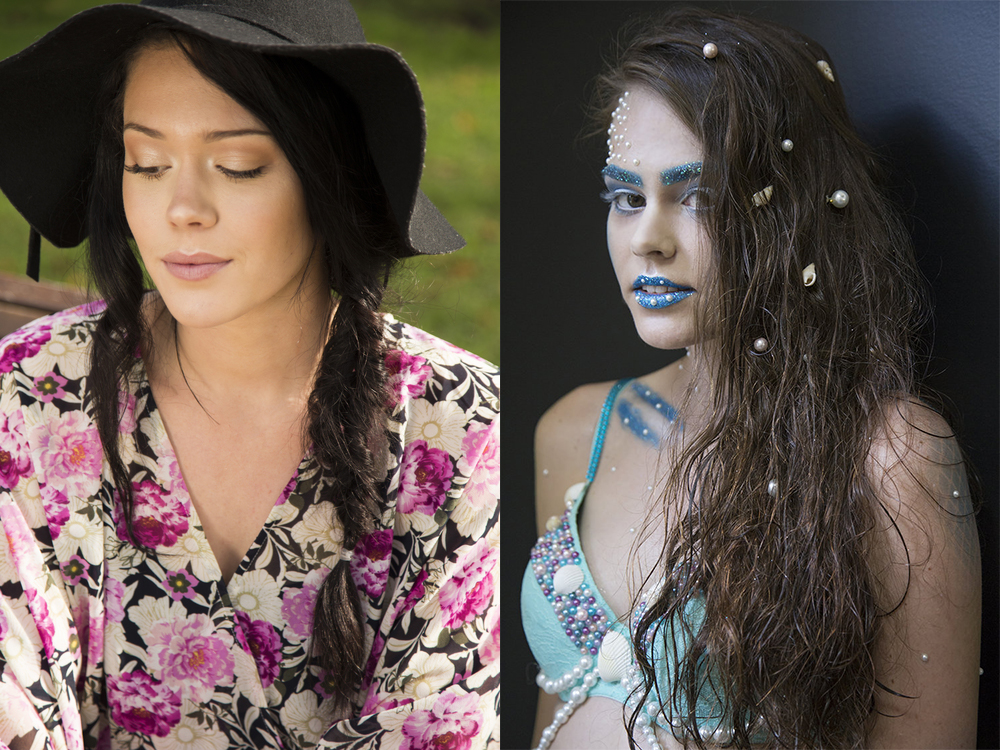
Natural lighting is often the most flattering, but try to avoid the harsh midday sun – especially if shooting outdoors. Your images may be filled with strong shadows and lines that might make you a bit odd, although can be a great artistic effect. For portrait or fashion shoots, try shooting in mid-morning or mid-afternoon – overcasts days are an even bigger bonus as the clouds act as a natural diffuser and spread light evenly across your subject. You can also get really cheap reflectors (like $8) from eBay that bounce light back onto the subject to fill in harsh shadows. You can also make your own with tinfoil and a piece of cardboard!
The Golden Hour
Sounds a bit lush doesn’t it? If you’re after a dreamy looking image (without going nuts on the filters), plan your shoot for first thing in the morning or just as the sun begins to set. This is when the sun’s light has natural, warm colour tones, and is softer on the final image. These images are often tinged with nostalgia, and the low angle of the sun creates long shadows and interesting lines for you to work with.
We all know how quickly the dawn & dusk sky changes, so be ready to get those shots! Make the most of your shoot by planning alternate images for after / before the Golden Hour.
Creating Your Own Light
The sun is only around for half the day (well it is the day, but it’s not always convenient) and sometimes life just doesn’t work like that. Since High School, I’ve been using whatever’s available around the house to create my own light sources (Hi mum! You definitely know the shot I’m talking about). One of my favourite quick fixes is a desk lamp – the kind that has a long bendy ‘arm’ are the BEST! They’re cheap (you probably already have one lying around), they’re easy to move around and provide reasonable light, especially those with stronger bulbs.
If you are interested in purchasing your own small lighting kit, there are a large number of very affordable options on eBay and Amazon. Contact sellers to find out more about their products and make sure to check their reviews and reputations before closing the deal.
Colouring Your Light
The colour of a light bulb also has an impact on the final result of an image – a fluorescent tube will result in a much cooler image, while a desk lamp can create strong yellow tones, depending on the colour of the bulb. These can be offset to give your image the feel you’re after with filters (like the ones available in Canva) or through correcting the white balance in Photoshop or similar tools.
Remember when I said cameras are similar to our eyes in the way they both process the colour of light? If you’ve ever spent all day sitting in an office with fluorescent tubes, you might notice a bit of a blue tinge to your world when you step outside – you can get the same effect with a pair of coloured, mirrored sunglasses. Our brain picks a familiar colour (neutral white/greys) and uses this to adjust ALL the colours in our world to be the ‘normal’ shade and tone. It’s like a reverse filter, that takes everything back to neutral! Your phone camera has the same effect, but it is computer generated instead and is called White Balance. In newer models (those with a ‘pro’ or ‘manual’ mode, you might find a ‘WB’ or small sun icon that allows you to adjust the warmth or coolness of your image.
Another pro-tip you can recreate at a fraction of the cost is adding layers of coloured light within your image. A packet of cellophane only costs a few dollars (and has a lifetimes supply for this purpose) and can easily be placed between your light source and your subject – try making a simple cardboard frame to keep it taught. And remember, lights get HOT. Do NOT put cellophane (or any other kind of flammable or meltable material) directly onto globes or shades. You’ll have a hell of a cleanup on your hands in the best case, or a small fire to put out if you’re not so lucky.
Get Creative
When you’re planning your photos, think about things you’ve got around the house that could jazz up your shots. Don’t think of props literally – think of what you can use to represent the look you’re after. A wooden tabletop can easily be recreated with a $2 roll of laminate from Kmart. Dresses and shirts can easily become tablecloths, and linen is a quick solution for backdrops. Create a colourful flat lay in a pinch using only a large sheet of craft paper, or see how you can play with shadows to create layers in your image.
There’s also that handy thing called borrowing – run out of dishes to present your meals in? Neighbours and friends will have ones you can borrow, and your local op-shop will also have constantly rotating stock of unseen & vintage pieces. Consider re-donating items when you’re done – set them free back into the world, and think of it like renting! You can also suss out local styling & prop companies in your areas. They may come with a larger price tag, but they’ll create a world of separation between your images and everyone else’s
NEVER be ashamed of your ability to improvise and work with what you’ve got – it’s half the fun of getting behind the camera! You’d be amazed at the hacks professional photographers use to get the perfect shot. Milk in cereal ads? Yeah, it’s glue.
So, are you feeling a little inspired? What’s the next thing you’re going to capture, and how has this post changed your approach?